How to makeover your old furniture with just one coat of paint
Do you believe that you could makeover your home furniture into something completely unrecognizable. If you haven’t tried it now is the time to do it. Choose a good and quality paint suitable even for beginners. Don’t prime or seal the furniture, just apply a coat of paint and the furniture is almost like new in this nice gray and blue color.
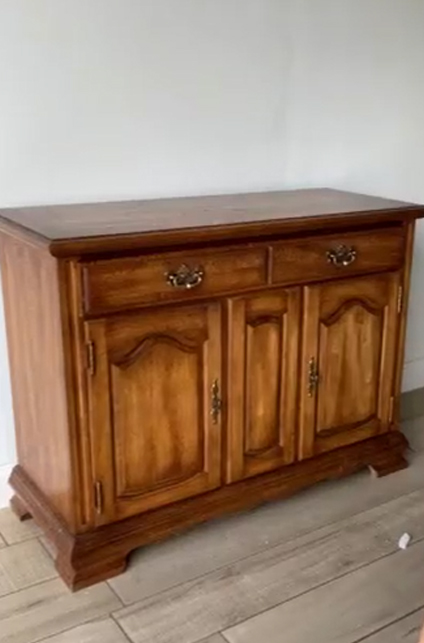
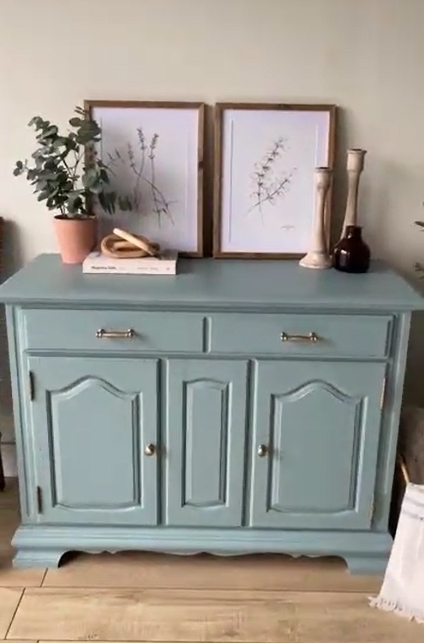
With more courage you can get a sideboard with a brand new look for your home interior.
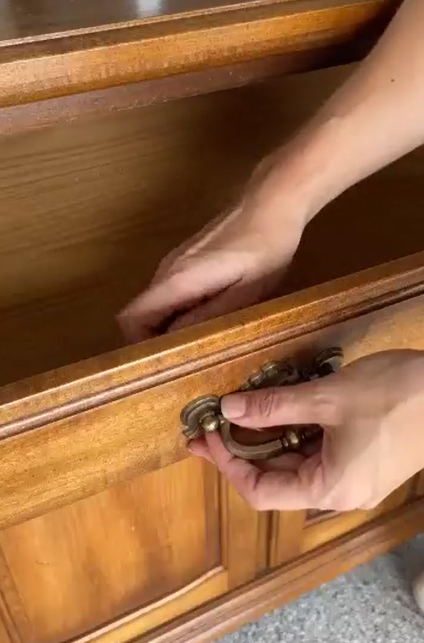
Step one: Remove the hinges, doors and drawers
Be careful when removing parts and hardware. Store everything in plastic bags so you don’t lose any important part. The fittings of the old furniture are quite worn and worn, so it is advisable to replace them with new ones. Most hinges are standard, so you will easily find new or close replacements.
If you are removing the drawers and sideboard doors, arrange them in the correct order so you don’t mess them up when reassembling.
Step Two: Clean with a degreaser
An important part of preparing to paint furniture is to treat surfaces with an all-purpose degreaser and remove dirt from every detail of your furniture.
If the furniture that you are going to renovate is smeared with a lot of wax and other oily substances, you can rinse it with vinegar and water or use mineral spirits. They are suitable for breaking down wax.
After cleaning, rinse it again with clean water.
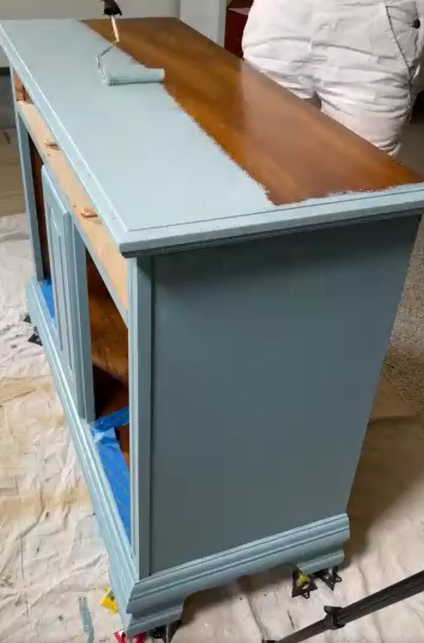
Step Three: Makeover of furniture by painting
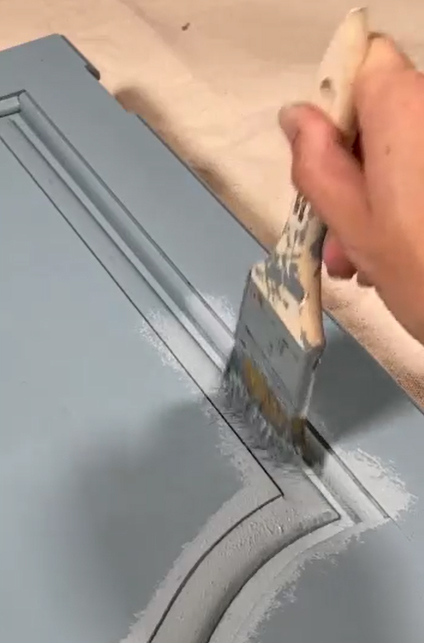
Make sure you thoroughly clean every single part of the furniture panel. Repair any damaged door, shelf or drawer. Get a nice fine brush or a large one if your piece of furniture has more surface area to paint. And start applying a thin and smooth layer to every curve of your furniture.
Get a professional furniture painting kit. They often come with two rollers, a chip brush and a brochure about the paint and how to use it. You will find sandpaper and a container to pour the paint into.
Choose fresh colors. In the example below, a grayish blue is used, but you can choose a light fresh green that does not irritate the eyes.
You use both a brush and a roller for universal paint. The brush is suitable for the details. With it, you can easily apply each stroke, as if you were preparing to paint. The next part of the furniture makeover is easier. After carefully going over the details with a brush. Take the roller and roll it over all the flat surfaces until everything is smooth.
You can also use a similar furniture makeover technique for kitchen cabinets, toilet cabinets, etc. This will refresh them and give them a whole new look.
After you have painted the furniture, wait five hours. Most paints dry quickly unless exposed to a humid temperature or left outside in the cold. Just in case, set aside at least half a day to be sure that there will be no unpleasant surprises.
Step Four: Take final look at the makeover furniture
Carefully examine every detail of the painted piece of furniture. Did you miss something if you were in a hurry? Makeover furniture takes time and sometimes you get nervous when you have to go through four doors or six drawers. But it’s all for fun, right?
When everything is ready it is time for final actions. If you used tape when painting, carefully peel it off and wait a few more hours for it to dry.
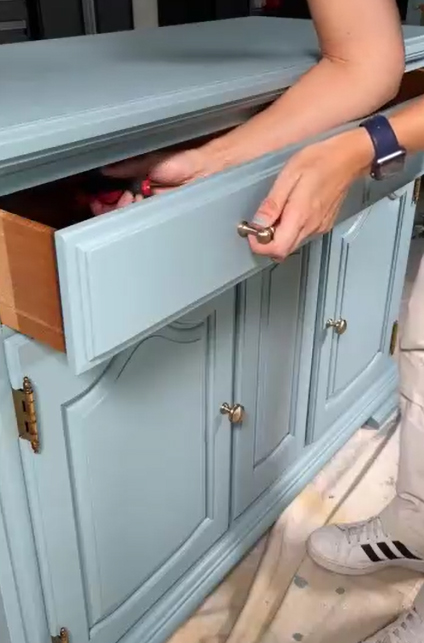
Place the hardware and doors back on the sideboard. If you did not choose original hinges, carefully tighten each screw and nut to prevent displacement. There is an option to paint the hinges in silver or gold to give them a new look.
And done! You saw it wasn’t difficult. If your sideboard also looks as well transformed as the photo shows, you will have no problems repeating this procedure again in a few years. The color of the makeover furniture is now also suitable for a bedroom or living room, as it is not too flashy.